Dairy Free Saag = less party-favor-ish

As I battle back and forth with my dairy issues, I’ve been craving Indian food. Usually a guaranteed party favor after eating anything with cream in it, I’ve avoided indian cuisine for the most part. There are, however, a bunch of places in Boulder that will substitute coconut milk in their curries which makes me a very happy panda. Saag Paneer is one of my all time fav things so I’ve recreated it subbing out the cream and the cheese. It’s pretty damn good and definitely satisfies the craving.

This version of Saag is definitely the stick to your ribs kind. It’s filling and you could probably use it to glue something together. I like it that way – if you want it ‘looser’, add more liquid and less cashew cream! You could also throw everything into the blender at the end and give it another puree. YOUR WORLD, these are just guidelines.

You’ll need:

  • A big pot. I use my dutch oven – you need something with a lid.
  • A sauté pan
  • A food processor or intensely fine chopping skills
  • A blender
  • A spatula
  • 1 package of tofu – I use a GMO free, firm tofu
  • 1 can of full fat coconut milk
  • 1-2 cups of vegetable or chicken stock
  • 1-2 tablespoons lemon juice
  • 3 teaspoons Garam Masala
  • 1 knob of ginger, really finely diced or grated with a microplane
  • 3-6 gloves of garlic, roughly chopped
  • 1 tablespoon whole cumin seeds
  • 2 teaspoons ground coriander
  • 2 teaspoons chili flakes
  • 1 teaspoon turmeric
  • 1 jalepeno, thai chili or fresno chili, roughly chopped
  • 1 red onion, medium dice
  • About 10 oz of fresh spinach. I buy one of the big tubs and use 3/4 of it or so
  • 2-3 tablespoons cooking fat of your choice, I like to stick with coconut
  • 3/4 cup raw cashews
  • Cilantro, roughly chopped
  • Salt and pepper to taste

Do this:

  1. Boil some water. Put your cashews in a cereal bowl and cover with the boiling water.
  2. Squeeze the water out of your tofu. Some people put a goddamn weight on top of it and let it rest for 20 minutes. I don’t do that. I squeeze it like a sponge and get on with my life. Get as much water out of it as you can, gently, then cut it into cubes.
  3. Heat a couple of tablespoons of coconut oil in your sauté pan over medium high. Add the tofu to the pan and fry on medium until all sides (or at least 3-4 sides) are golden and delicious. This takes about 15 minutes in total so just keep an eye on it while you do the rest of your business. When it’s done, take it off the heat and set aside.
  4. MEANWHILE…melt some coconut oil in your pan/pot on medium high heat and add cumin seeds once the oil heats up. Let those pop and fry for a few minutes, until fragrant. Add onion to pan and sauté until they begin to caramelize an soften, about 7 minutes. Add the garlic, fresh chili and ginger for the last minute.
  5. Set up your food processor and put a few handfuls of spinach in there. Then put a bit of the onion/cumin/garlic/ginger mixture on top, then another layer of spinach. You’re going to pulse all of this together in batches. It usually takes me about 2-3 batches before all of it is combined together. Don’t pulverize your spinach…or do….this is your world! The more you process the spinach, the more it will break down. I like mine right in the middle.
  6. Add the spinach/onion/garlic/ginger magic back to your pot with some more coconut oil and 1 cup of veggie or chicken stock.
  7. Add remaining spices and stir to combine everything together. Add coconut milk and cover, letting everything simmer for about 15-20 minutes on low heat.
  8. While everything is simmering in your pot, add the cashews to your blender with *most* of the liquid they were soaking in. Blend the crap out of it, adding more water when necessary. You’re looking for a smooth consistency, kind of like yogurt or sour cream.
  9. When your cashew cream is all ready, add it to the pot and stir it in. Now you can start adjusting your seasoning! Use full mineral salt and get after it. Throw in your lemon juice and add anything else that might be missing. I often use a bit more garam masala or chili flakes.
  10. When you’ve got it how you want it, add the tofu. Stir everything together one last time, cover and let simmer for 5-10 minutes more on low heat.
  11. Serve with basmati rice and garnish with cilantro!

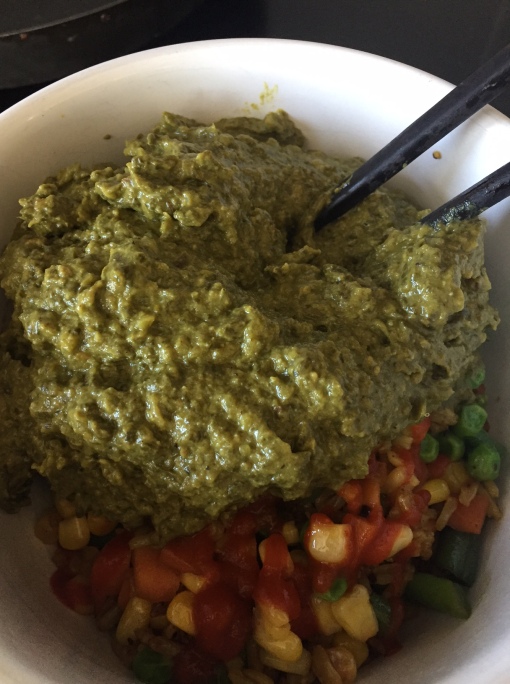
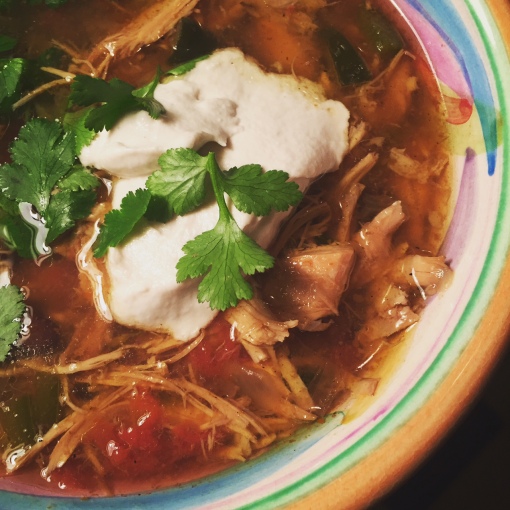
I don’t have any pictures of this dish because they all kinda look like baby diapers. I’ll see if I can snap one the next time I make this and share it here :D

OKAY I found a picture…and it still looks like a baby diaper. BUT IT TASTES SO GOOD!IMG_4342

Pan Sauce Basics – Chicken with Lemon and Rosemary

Pan sauces are one of those magical things that take a standard dinner to a new level. Although they might sound a little intimidating, they’re really straight forward and are incredibly versatile.

The following recipe is the one I’ve used the most to practice my pan sauce skillz. It’s simple and only requires a few grocery-store-only ingredients that you’ll have to pick up in preparation. It’s also easy to adapt this recipe with different veggies to really make it a one pan dinner. Or lunch. Or breakfast?!

You’ll need:

  • A large, oven safe sauté pan or cast iron skillet
  • Tongs and a wooden spoon/spatula
  • 6-8 bone in, skin on chicken thighs
  • 1 1/4 cups chicken stock
  • 2 lemons, quartered and seeds removed
  • 8-10 olives (I love cerignola’s so I use those – pits or no pits, your choice!)
  • 3-4 sprigs fresh rosemary (thyme works nicely as well)
  • 8-10 baby bella or crimini mushrooms, quartered
    • Optional: 3-4 fingerling potatoes or fingerling sweet potatoes. If you use potatoes, cut back on the mushrooms
  • 5 cloves garlic, smashed
  • 3 tablespoons coconut oil (or avocado)
  • 1 tablespoon arrowroot powder or organic corn starch (optional – you can thicken simply by reducing)
  • 2 tablespoons cold water
  • Salt and pepper to taste

Do this:

  • Trim your chicken thighs. I remove some of the extra skin just so I’ve got a nice layer right over the top of the thighs. I may or may not put my leftover skin on a baking sheet and pop it in the oven for 10 minutes at 350….

IMG_3830

  • After trimming them, season the skin side with a few generous sprinkles of salt.
  • Preheat your oven to 450 degrees and put a rack in the middle of the oven. Be sure there isn’t a rack directly above your chosen rack – you’ll need to fit your pan in there!
  • Heat 1 tablespoon of your chosen oil in your sauté pan on the stove. Get it really hot to the point that it starts smoking. Pour off the oil, wipe down your pan and return it to the stove. You’ve now made your pan non-stick! Feel free to skip the above if you’ve got a non-stick sauté pan big enough for the job :)
  • Heat remaining 2 tablespoons of oil on medium high heat. Place your chicken thighs in the pan, skin side down and ‘fry’ for 5 minutes. You should have a nice, golden colored, crispy skin under there! If not, give them another minute.
  • Turn the chicken thighs skin side up and move to the perimeter of the pan. Add 1 cup chicken stock, mushrooms, 6 lemon wedges, garlic, potatoes if using and rosemary to the middle of the party. Place the olives amongst the rest of the crowd.

IMG_3968

  • Bring liquid to a boil, remove from stove and put in the oven uncovered for 30 minutes.
  • Transfer pan from the oven to the stove and remove your thighs – I let mine rest on a cutting board. The skin should still be crispy, but the underside should be nice and juicy!
  • If you’re making a slurry to thicken the sauce, add 1 tablespoon arrowroot or corn starch to a small bowl. Add 2 tablespoons COLD water to the slurry and mix with your finger to combine.
  • Remove the rosemary and add remaining 1/4 cup chicken stock and squeeze the two lemon wedges in. Bring to a boil.
  • Slowly drizzle in slurry while whisking constantly. Let things thicken up – make more slurry if you want it thicker and let it boil once all the slurry is in the pan. This will cook the starch and prevent it from tasting like…glue…
    • If you want to skip the slurry altogether, keep reducing the pan sauce and don’t add the remaining 1/4 cup of stock.
  • Season with salt and pepper to taste. Add thighs back into pan briefly and voila!

To serve, use your tongs to take out chicken, potatoes, mushrooms and olives. Garnish with a lemon wedge and spoon the pan sauce over the chicken and veggies. Sometimes I’ll throw in a few handfuls of spinach at the last step to get more green in there or simply serve the chicken on a bed of spinach or with a big salad!

And there you have it – perhaps your first pan sauce! Once you’ve done it a few times, it’s easy to start thinking of other ingredients to add in or substitute in. White wine, red wine, lemon juice, beef stock, veggie stock – the list goes on!

Warm Lentil Salad – Goes with Errythang

In November of 2014, I had an allergy test run that told me I was very reactive to eggs, white potatoes and sesame and mildly reactive to rice, corn, dairy (goat, sheep, cow), tapioca and something else I’m forgetting.

Needless to say, that month sucked. I did my very best to eliminate all of those foods for 3 months and then start adding them back in. After a year and a half, I’m able to tolerate eggs in moderation and the rest of that list, too. I’m on the fence about allergy testing in general – I know I feel very good eating a mostly protein, fat and veggie carbs diet but I don’t fall apart having sushi every now and again or eggs once or twice a week.

I DIGRESS. When I wasn’t eating anything fun, I had to get really creative with breakfast. I make this lentil salad at least once a week and serve a couple spoonfuls with just about everything. This recipe is particularly easy because I cook my lentils like pasta – there’s no real risk of messing them up!

You’ll need:

  • A medium sauce pot
  • A sauté pan
  • A small mixing bowl
  • A whisk or fork
  • 4-5 cups of water
  • 1 cup uncooked, dry le puy lentils (otherwise known as green french lentils)
  • 1 small yellow onion, small dice
  • 1 clove garlic, minced
  • 3 medium carrots, small dice
  • 2-3 sprigs fresh rosemary
  • 1-2 tablespoons oil for sautéing (I like coconut or butter works fabulously here!)
  • 4-5 tablespoons Olive Oil
  • 3 tablespoons Balsamic vinegar
  • A drizzle of honey (optional)
  • 1-2 teaspoons of some kind of mustard (I like stoneground)
  • Salt and pepper

Do this:

  • Boil water in your sauce pot. Once it’s brought to a boil, add salt. Add salt until your water tastes like the ocean. YES I’M SERIOUS! Adding salt now is the only real way to get any flavor into those lentils! As always, full mineral salt is the best option.
  • Add lentils to the pot and reduce heat to a rolling simmer…somewhere between the boil and a simmer! Leave uncovered and cook like pasta for 15-20 minutes. At the 15 minute mark, taste your lentils.
    • If they’re still too undercooked, cook them some more! I’ve had them take up to 25 minutes to really get the texture I like so play around and know you won’t mess them up ;)
    • If the water starts to evaporate, add some more.
    • OPTIONAL: you can add a sprig of rosemary to your lentils while they cook if you really love that rosemary flavor!
  • While lentils are cooking, heat your coconut oil or butter in your sauté pan. Add the sprigs of rosemary and let it bubble about a bit.
  • Add garlic, onions and carrots to the pan and sauté on medium heat for 5-6 minutes or until carrots and onions have softened up a bit – this is totally a preference thing!
    • Sometimes I really crank the heat up and get a little bit of char on the carrots. Also a great alternative fat for sautéing is bacon fat…just sayin’…
  • Remove the mixture from the pan and let cool in a bowl. Take out the rosemary sprigs.
  • Make your vinaigrette by first adding your balsamic to a small mixing bowl. Add the mustard and honey and mix to combine. Slowly begin drizzling the olive oil into the bowl all the while whisking with your fork or whisk to make an emulsion. Season with salt and pepper to taste and set aside.
  • When the lentils have cooked to your liking, drain them and let cool a bit.
  • Add onion/carrot/garlic mixture to the lentils and fold gently to combine. Drizzle the vinaigrette and continue folding to incorporate.
    • If you feel you don’t have enough vinaigrette, you can always whip up a little extra :) I like mine dressed pretty lightly, just enough so that the balsamic flavor comes through but doesn’t overpower my mouth!

Boom! There you have it! You can serve these warm or cold. I like to have them in the morning with a green salad and a little leftover chicken or something. I also make some killer noodle bowls and often add the lentils as a component to the dish!

The only photo I have of these lentils is not very illustrative of their amazingness…they’re kind of overpowered by that magnificent New York strip on top aren’t they…

IMG_9075

Crack Soup aka Cartel Caldo

This soup has become one of my weekly staples, especially when it’s cold outside! Even though I tend to be verbose in my explanations, you probably have all the basic ingredients in your fridge & pantry so don’t be intimidated by the scroll factor in this post :D

Why crack soup? I shared this recipe with some of my girlfriends who then made it for their husbands who then took it to work and the entire office deemed it “crack soup”. It is damn good. Okay, here we go!

You’ll need:

  • A crock pot
  • A big wooden spoon or spatula and a slotted spoon or tongs
  • A sauté pan
  • 4-5 cups water or chicken stock if you have it (everything is better with stock!)
  • One whole chicken, no giblets (organic or pastured if you’re feelin’ saucy)
  • One medium red onion, diced
  • 2 tablespoons whole cumin (ground will work in a pinch but it’s way better with whole)
  • 1, 15 oz can tomatoes (I like the roasted and diced kind but any will do)
  • 1, 15 oz can black beans (any canned bean would work but I prefer black)
  • 1 jalapeño diced
  • 1 tablespoon chili powder (I use chipotle or something similar)
  • 1 poblano pepper, diced (optional but adds some really amazing flavor!)
  • 1-2 cloves garlic, minced
  • Juice from two limes
  • 1-2 tablespoons preferred cooking oil (I like avocado or coconut or BUTTER!)
  • Salt and pepper to taste

Do this: –

  • In your sauté pan, heat oil on medium. Toss in garlic and stir with your wooden spoon/spatula until you can smell the magic. Toss in half of the cumin and lightly toast in the fat with the garlic. Toast until fragrant.
  • Toss in chopped red onion, reduce heat if the smell goes from magic to slightly burny and sauté together for about 5-7 minutes. Add in the last half of your cumin now and incorporate with everything. Take pan off heat.
  • In your crock pot, add water (or stock, or half and half!), canned tomatoes, jalapeño, poblano and chili powder. Stir gently to combine everything.
  • Add onion/garlic/cumin from your pan to the crock pot and stir again.
  • Add the entire chicken to the crock pot and watch your liquid level – you want the liquid to just cover the chicken. If it doesn’t, add a bit more liquid.
  • Turn the crock pot to low and cover.
  • Go about your life for the next 6-8 hours OR overnight. Often I leave mine on for 14-16 hours and it was magical. Hard to screw this one up so don’t fret about the time! If you need to speed it up, put it on high for 3 hours.
    • You are essentially making stock out of the whole soup so the longer you let it mellow out, the better it’s gonna be!

When you’ve deemed the crack soup finished, here’s what to do

  • Carefully remove the chicken from your crock pot with the slotted spoon and/or tongs and put it in a big bowl. Remove any straggling pieces from the crock pot – you don’t want any surprise bones in there! Be careful, that baby is hot!
  • Let the meat cool off for about 10 minutes then use two forks or your tongs (or your hands if you like to get in there and handle it) and separate the meat from the bones. I also remove the skin.
    • If you’re into making stock, save the bones and freeze them!
  • Once you’ve removed the meat, shred it and put it back into the crock pot with everything else.
  • Add the can of beans and the lime juice.
  • Stir everything together gently and season with salt! Keep tasting it until you get it right – for that much liquid, I add at least 1-2 tablespoons of full mineral salt.

I like to serve mine with some fresh cilantro and lime wedges. If I’ve got leftover rice, I’ll throw a little of that in there. I also like to top it with a dollop of cashew sour cream (recipe soon!) or greek yogurt! As always, soups, stews and braises are better the next day ;)

This recipe will feed a shitload of people or YOU for a week!

IMG_3833